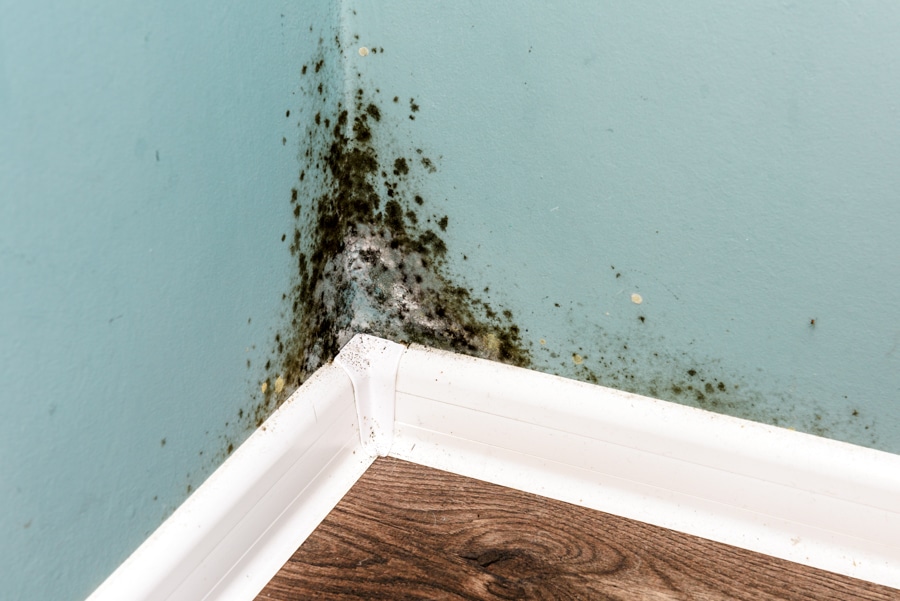
Damp spots, condensation and mouldy walls are the bane of all homeowners’ lives. Whether it’s the faint smell of damp, or the lovely black mould spots that keep popping up on your freshly painted white walls. It’s a pain to get rid of and quite frankly you’re baffled as to why they keep coming back.
Understanding where the damp is coming from and why, is the first step to getting rid of it once and for all.
Identifying Damp Walls
The most common signs that you may have a damp wall issue in your property are:
- Peeling wallpaper
- Condensation on windows
- Dark or discoloured patches on walls
- Peeling or cracking paint
- Walls, floors or ceilings that feel cold or damp
- A damp and musty smell.


What are the causes?
There are several reasons why damp walls can appear in your home. It is really important that you get to the bottom of the issue and find out the cause before there is further damage.
Poor Ventilation
Damp walls can be caused just from everyday life… things like cooking, washing, showering, drying laundry and even breathing. The moisture that is generated needs a way to escape otherwise it will build up and begin to cause condensation, eventually leading to damp. Properties are fitted with air bricks to allow air flow and reduce condensation build up, if these are blocked by CWI, it means damp can start to build up meaning damp spots or more seriously affecting timber floors which will begin to rot.
Leaking Plumbing (Burst Pipes)
Probably the most obvious cause of damp walls; old or loose plumbing can produce damp spots on walls, usually in the corner of the room. It will be obvious as the patch will grow due to the use of water supplies in your home. Also, it can be anything from a small trickle to gushing water, this will affect severity of the damp spot.
Roof Issues
Rainwater can easily penetrate your home if you have issues with your home’s roofing. Missing or broken tiles allow rainwater to seep in making it way down into the walls. Just like the leaking plumbing, the range of how severe the damp is can vary if a tile is cracked, loose or poorly fitted, this will be less severe than if you have a whole tile missing.
Faulty Cavity Wall Insulation
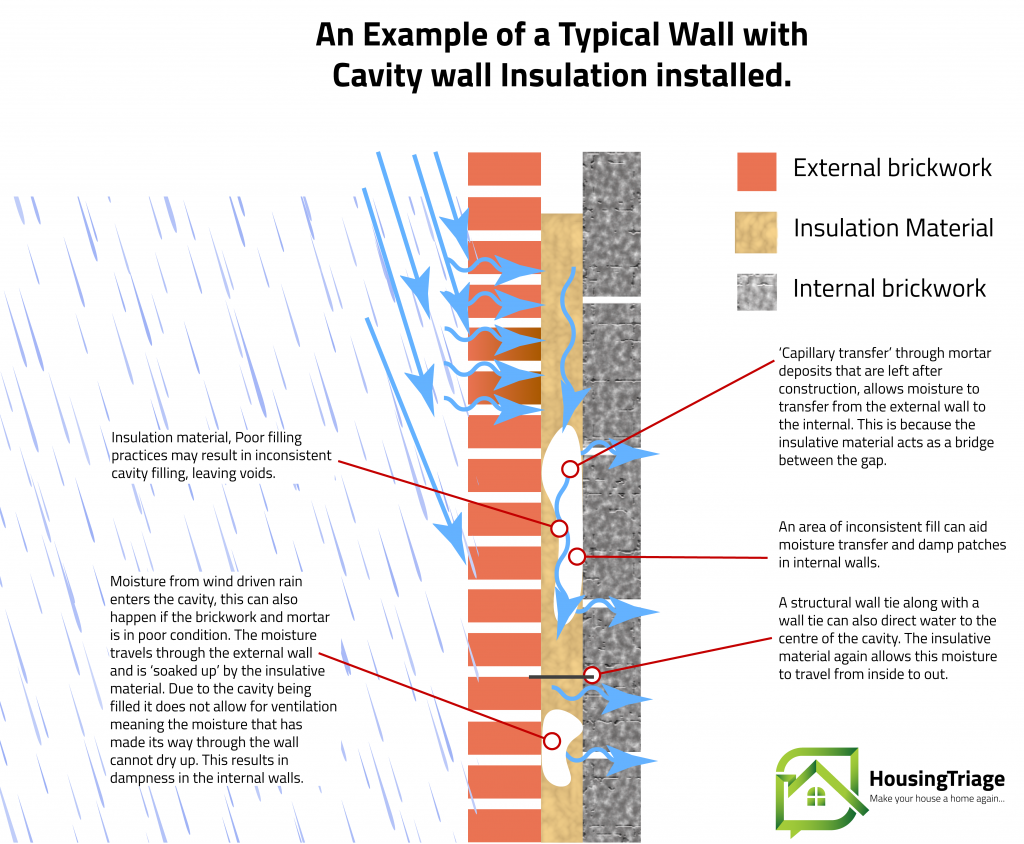
In recent years poor installation or incorrectly fitted cavity wall insulation has become a huge issue for homeowners, causing damp walls, mould and condensation. Gaps in the cavity wall insulation itself lead to cold spots which eventually become damp. Secondly the insulation itself can act as a bridge from the external wall to the internal walls, transferring moisture from outside to inside.
How To Prevent Damp Walls
So… if you’re now wondering how you can protect your home against damp, or you want to prevent it getting any worse, here are some things you can do to help:
- Check your roof for any damage.
- Keep your gutters clear of debris.
- Check your external brickwork and the mortar in between is not crumbling.
- Keep your home warm with wall and loft insulation.
- Ensure your double glazing is fitted correctly or still in good condition (misty windows).
- Try to maintain a more consistent temperature in your home.
- Good ventilation is key! Extractor fans should be installed in bathrooms and kitchens.
- Ensure washing machines and tumble driers should be plumbed in and vented correctly.
- Opening windows also helps allow moisture to escape.
- Dry washing outdoors if the weather allows! Or use a tumble drier. Drying washing indoors on radiators produces a lot of moisture.
- A dehumidifier is a great option too, especially if drying laundry inside can’t be avoided.
- When cooking, try to always cover your pans with lids to reduce the amount of steam escaping.
- Make sure you are using your cooker hood/extractor fan when cooking. Also leave it on for a little while after to really make sure all the moisture escapes the house.
- Keep the filter in the cooker hood clean so it is working as efficiently as possible.
- Moisture resistant paint and wallpaper is a great choice if your home is prone to damp, also great for use in bathrooms and kitchens.
- Leave room between furniture that touch colder outer external walls, allowing air to circulate.
- If you experience a lot of condensation on windows, be sure to have a generous length of curtain rail so the curtains can be fully moved away from the moisture.
How To Repair Damage
Once you have tackled your damp walls problem, the first thing you will want to do is get rid of those unsightly mouldy black spots. The first thing you need to do is give the spot time to thoroughly dry out, using a dehumidifier can help speed this process up!
Secondly, seal the surface of the affected area with a mould resistant/anti-condensation paint:
Once dry you can paint the surface again with a damp seal or stain blocker paint which will ensure the staining does not return finally touch up the area with the same colour paint used on the surrounding area.
If cavity wall insulation has caused the problem how can this be fixed?
If your cavity wall insulation has failed, then the first thing to do is get it removed.
This is done by a process of blowing compressed air into the cavity which breaks down the insulative material and blow it towards a vacuum which sucks the waste material out.


How much will it cost?
Check-a-trade states that roughly the costs of removal is between £21-£22 per m². Which on average works out as £1680 + VAT for a semi-detached property or £2520 + VAT for a detached property.
A survey will need to be carried out
A specific CWI survey will be needed to find out if you have any problems with your CWI. This thorough in-depth assessment will figure out if your home has defects in the insulation. A residential surveyor can also collect information just from looking at the walls.
Claiming Compensation For Poorly Installed Cavity Wall Foam
If you’ve had cavity wall incorrectly or poorly installed then, you can claim back on the cost to have it removed meaning you won’t pay anything for having your home put back to how it was before the CWI was installed.
How Housing Triage can help you
Housing Triage are here to help you claim operating on a “No win, no fee” agreement, helping you claim compensation against the removal costs of the CWI. A surveyor will provide an estimate of the cost of any works needed to repair the damage to the property and place it back into the condition it was in prior to the CWI being installed.


